Case Study: Brewdog Brisbane
Introduction
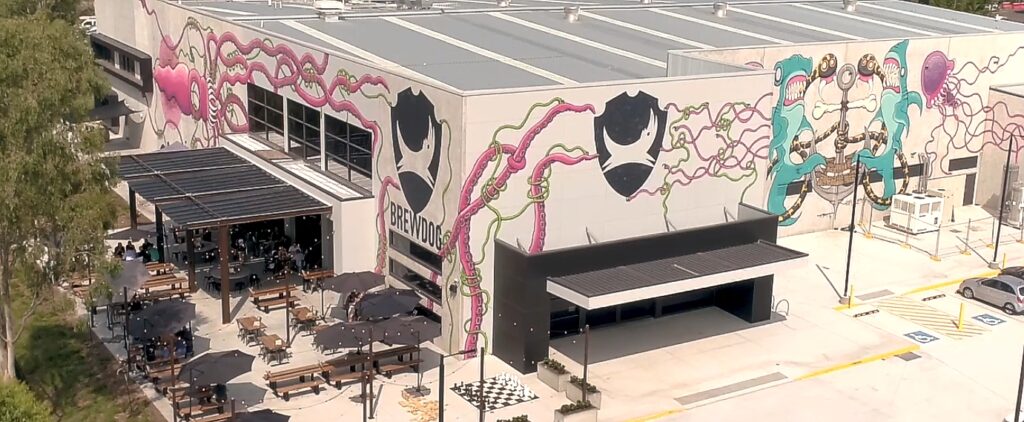
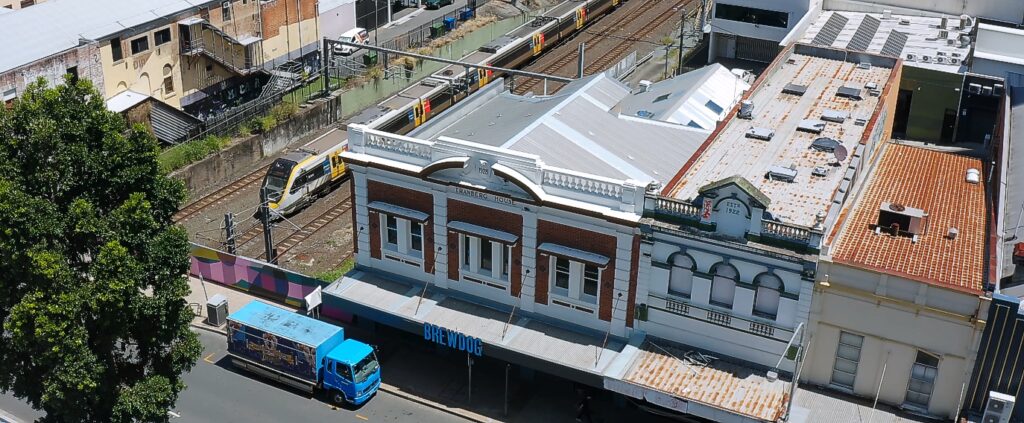
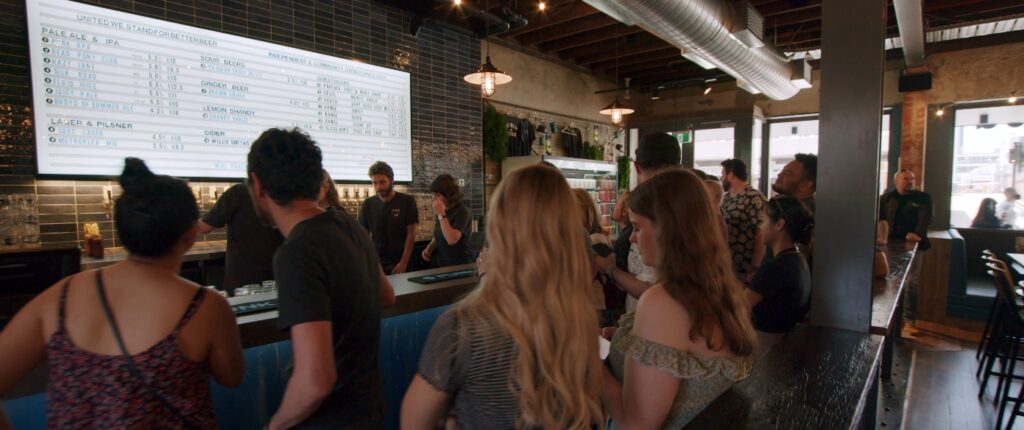
Not content with one tap-house in the city, Brewdog have expanded their offering in Brisbane to encompass a beautiful heritage listed building in the up and coming Brunswick Street area near the main train station. This building could not be more different in appearance from their other location in town – the urban utility styled DogTap bar and restaurant overlooking the river by the Gateway Bridge.
Their latest home in the city is located in Tranberg House, designed for Charles Tranberg by his brother in law, Francis Hall, and constructed in 1928. The Tranbergs had run commercial businesses in and around Brunswick Street from the 1870s, including a fuel depot operating on the site of Tranberg House in the 1910s and early 1920s. The property was constructed during the Valley’s peak period as a commercial hub and was built as an investment property, leased to various tenants.
The refit from its previous incarnation as a trio of smaller businesses, encompasses the entire property, over three floors, with a basement, a large first floor mezzanine level and outdoor terracing.
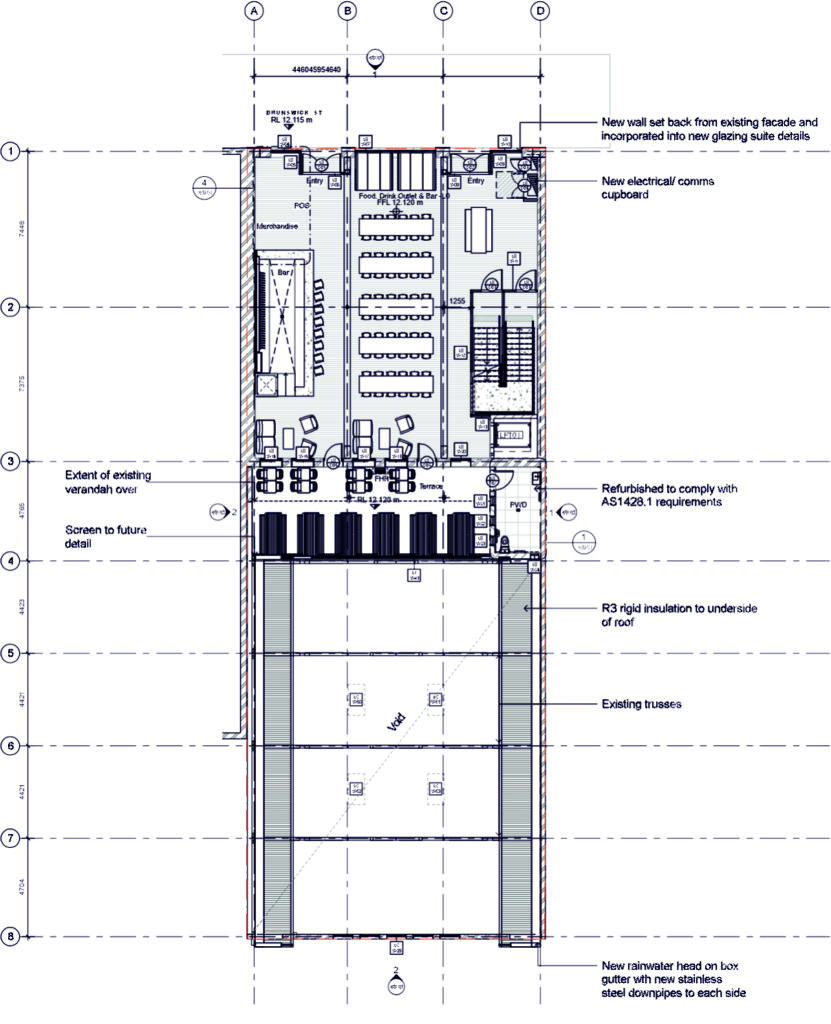
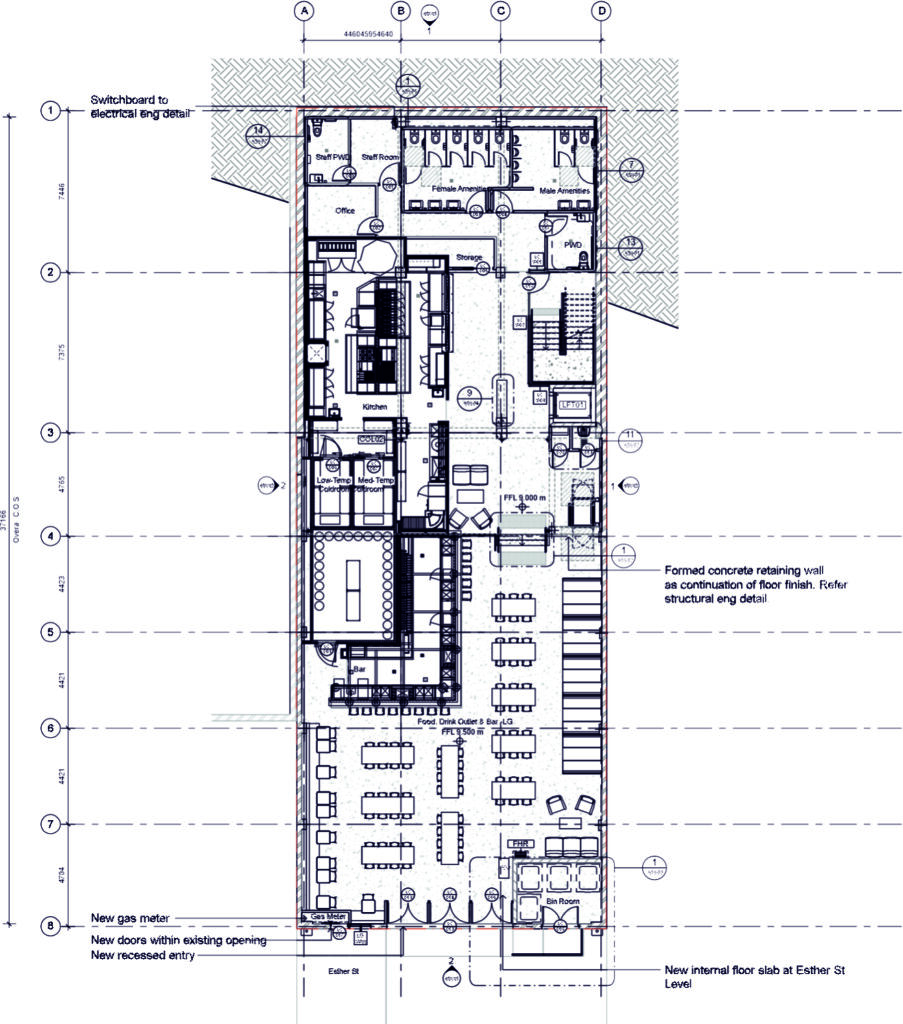
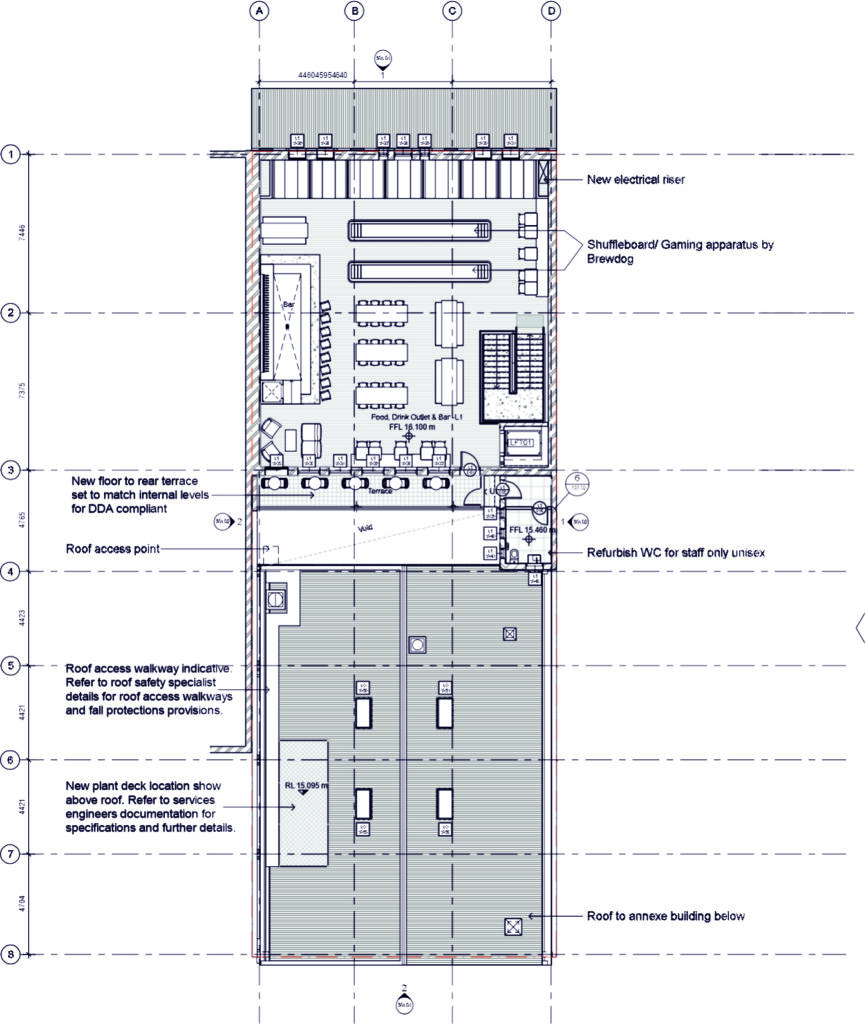
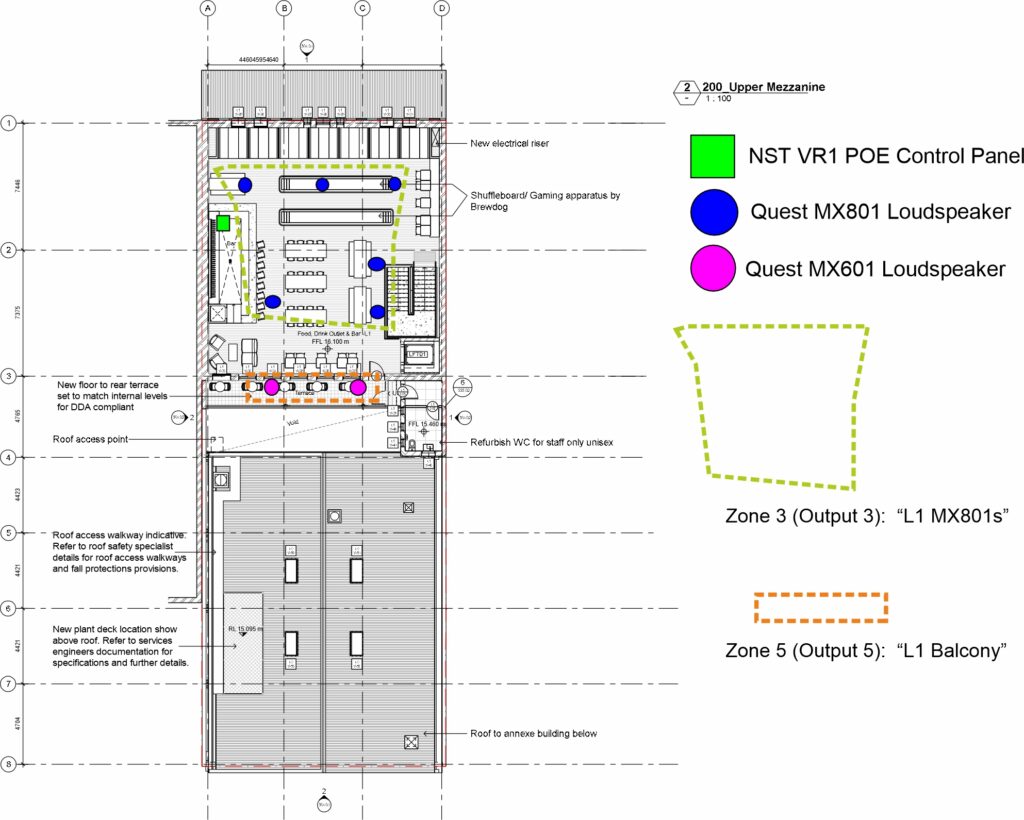
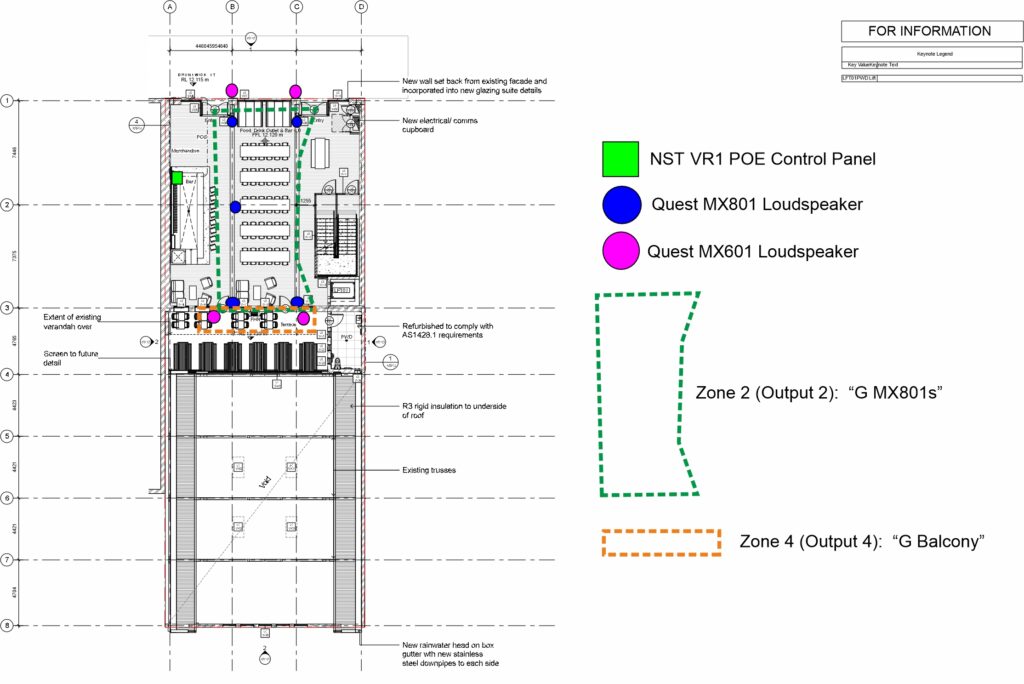
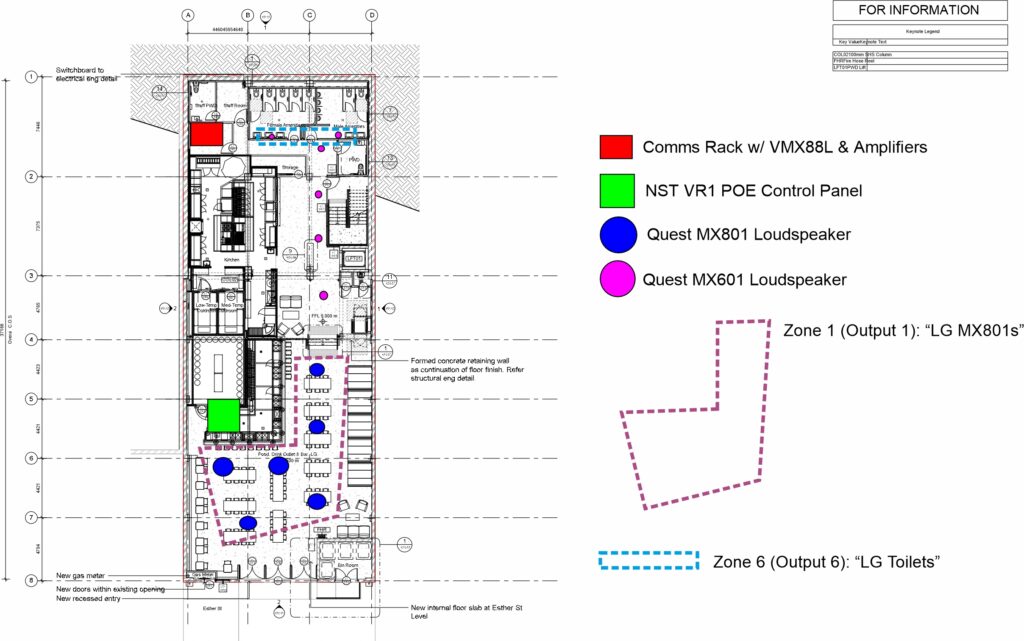
Building plan
Entering via Brunswick Street into the main bar, this area can cater for up to 130 with additional space on the rear terrace/balcony.
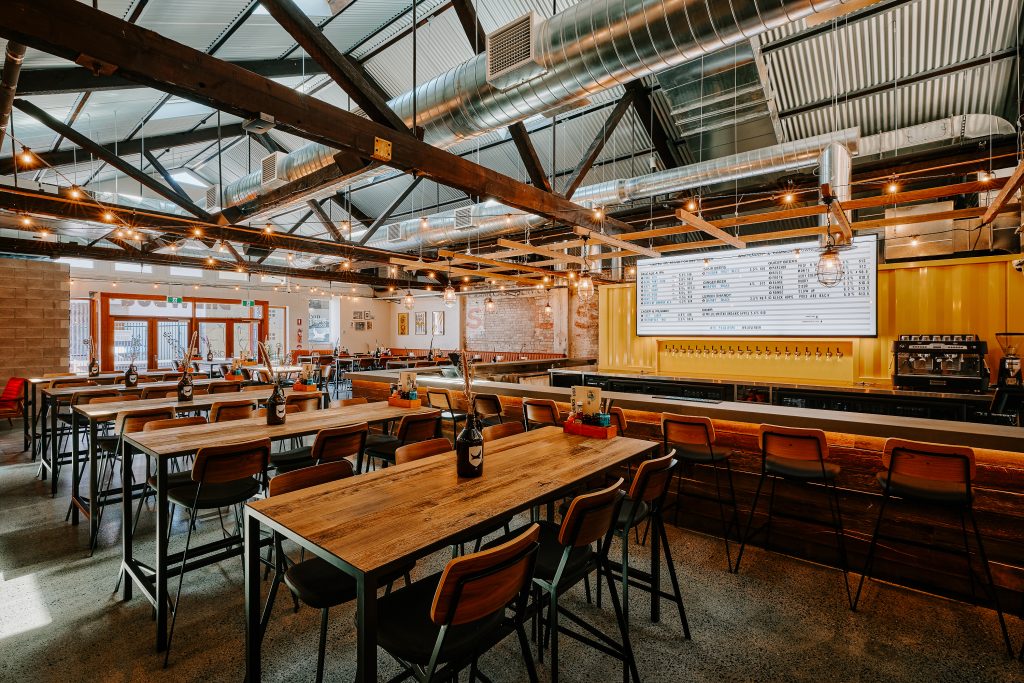
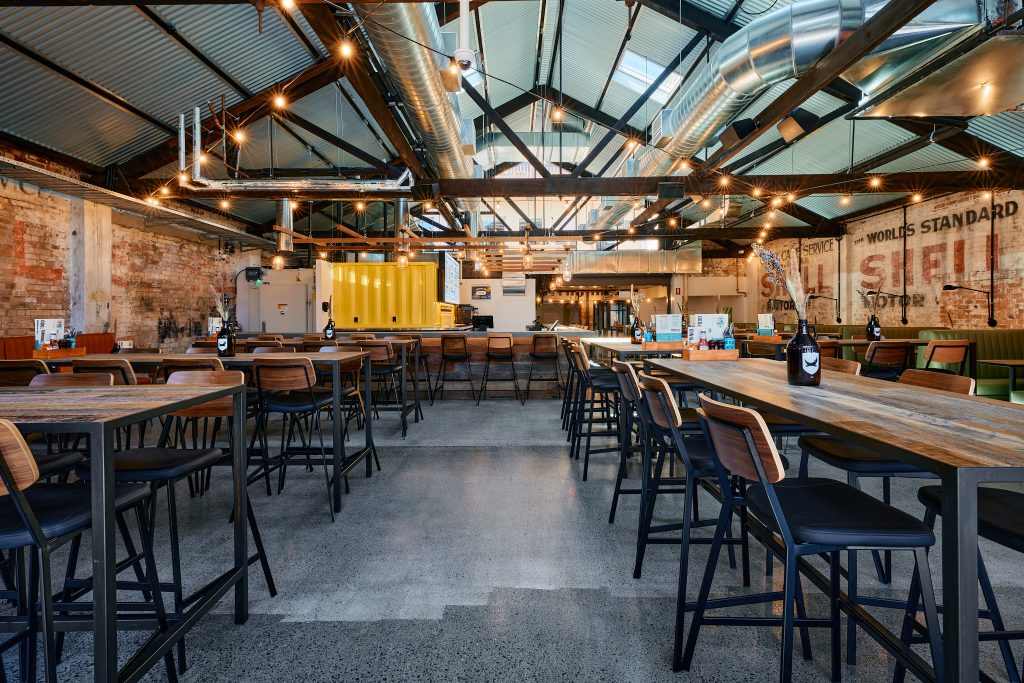
Downstairs there’s the kitchen, staffroom and toilets, plus the expansive beer hall at the rear of the building. This is an extension behind the original building with a high vaulted roof, tying in with the industrial taproom aesthetic.
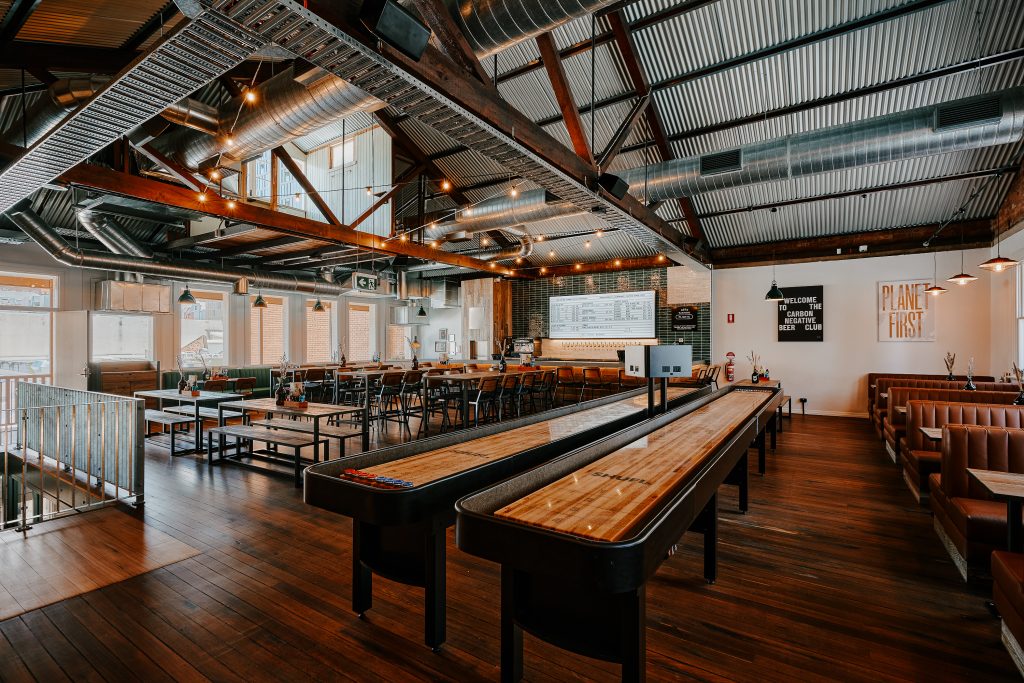
Upstairs, there’s the level one mezzanine – still a large space in its own right, with room for a further 110, and including its own bar and a smaller balcony that overlooks the rear terrace area.
Customer Brief
The installation was undertaken by BSG (Brisbane Sound Group) – specialists in audio but additionally AV installation and sales.
Engaged by Advent Facilities Management to design an in-house PA system for BrewDog, Josiah Kerridge, BSG’s AV Installation Project Manager, explains the requirements:
“We were essentially tasked with finding an audio solution that would fit the budget and desired coverage area while performing effectively and remaining simple for staff to operate. I’d used Quest speakers quite a lot in the past, particularly in a number of breweries, so I was confident that the MX801 and MX601 loudspeakers would be a top choice.”
He continues: “I was shown the NST Audio processors at Group Technologies last year and I was quite impressed with their capabilities. Given we had a multi-level space that required individual zone control, I decided the VMX88L would be a great option for straightforward audio routing and management.”
The choice of a VMX88L was due to its ability to act as not only a high quality zone mixer, and an audio matrix but also perform as a crossover and speaker management system. Including powerful features like individual compressors for each input, 8 bands of parametric EQ and up to 1.3 seconds of programmable delay for aligning installed sources plus full crossover filters and two stage limiting on outputs, the VMX88L is an extremely capable tool for integrators and audio professionals.
The processor can be remotely controlled using either D-Net – NST Audio’s software application – running on either a Windows or Mac laptop, or wirelessly on iPad.
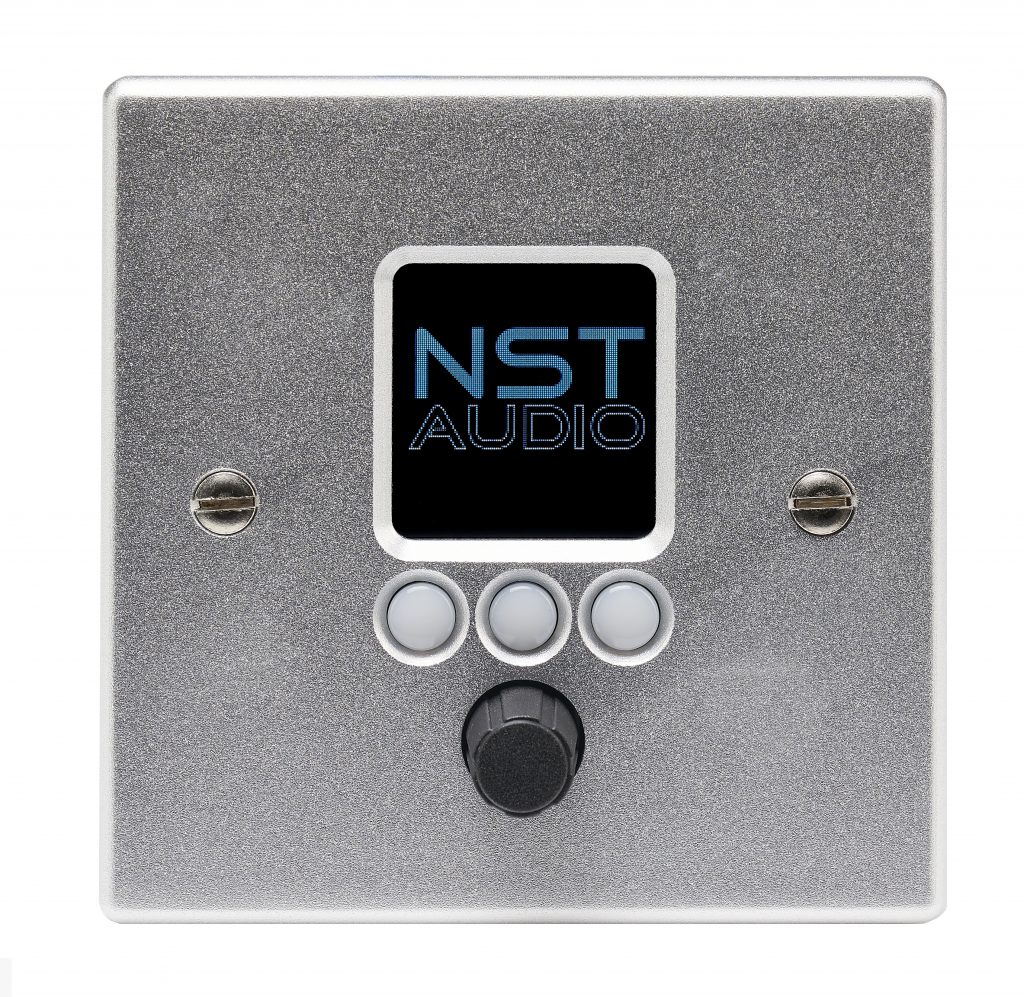
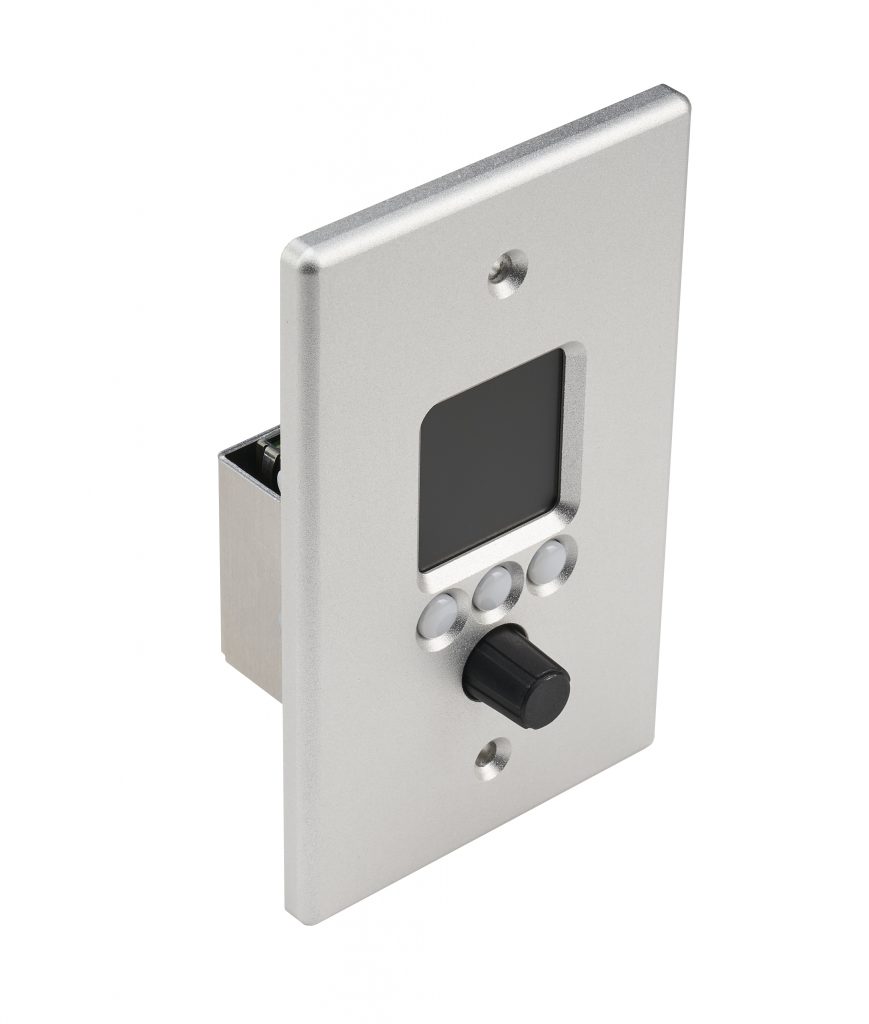
Crucially, once the initial configuration has been designed and implemented (which can also be achieved off-line and downloaded during commissioning on site), hands-off remote control can be simply added via VR1 (or new VR2) remote wall panels. These PoE remotes can be individually configured to offer control of any gain point in the system (from matrix levels to input or output faders), scene recalls, or muting and routing changes.
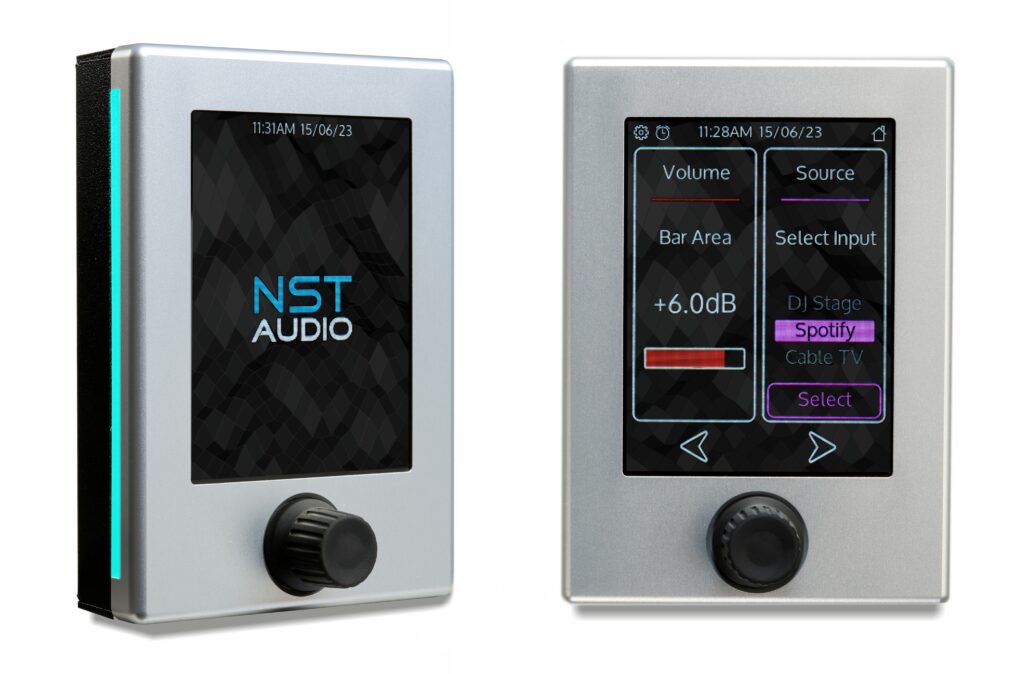
VR2 was not available for this install as was completed just before VR2 went into production – August 2023
Installation Plan
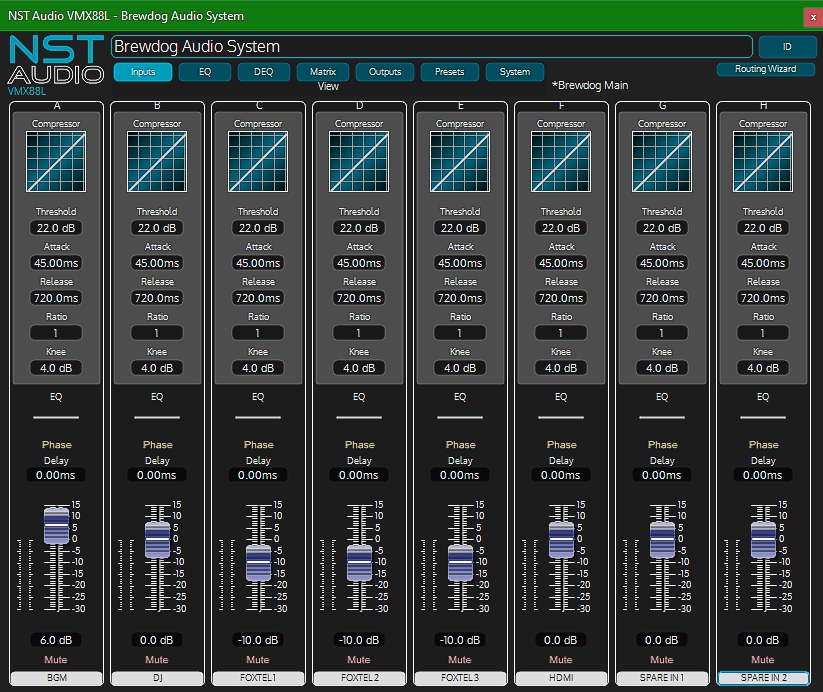
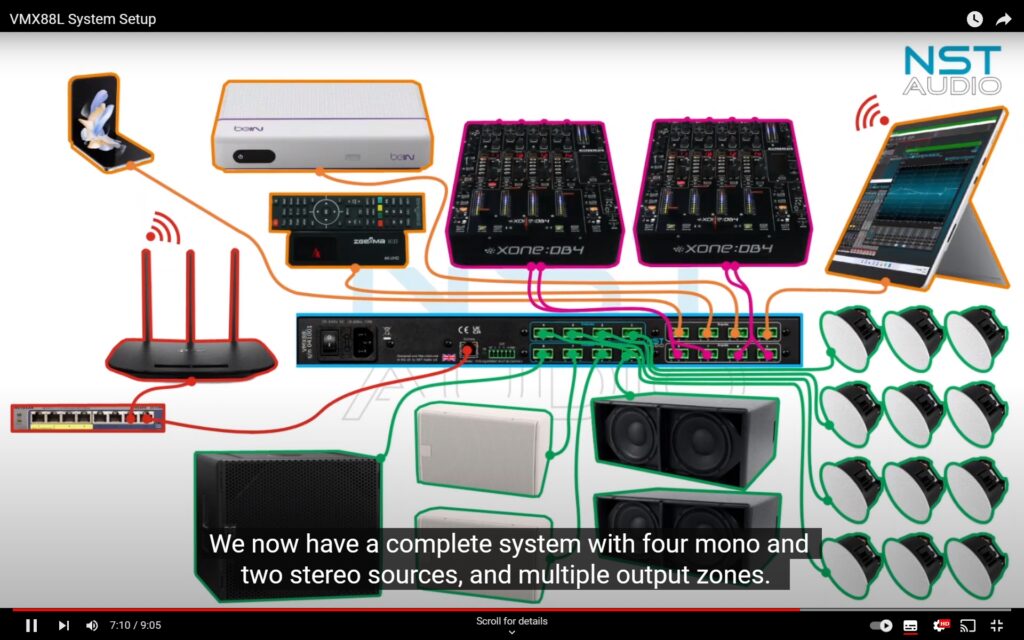
The input makeup consisted of three Foxtel streaming receivers (with digital audio output which was converted to analogue before the VMX), plus an HDMI audio output from a terrestrial TV source (again, converted externally), plus a background music source (laptop playing Spotify) and a DJ mixer input. All inputs were used as mono sources.
Josiah commented further on the installation process:
“This was my first time using NST’s VMX88, and honestly, it was very simple to set up and get everything connected on the network. The processor covered all our zones with ease – we have Foxtel streaming and local inputs for background music. This install didn’t require network audio so we were able to use the “L” version of the processor and forego the Dante inputs, which pleased the customer.”
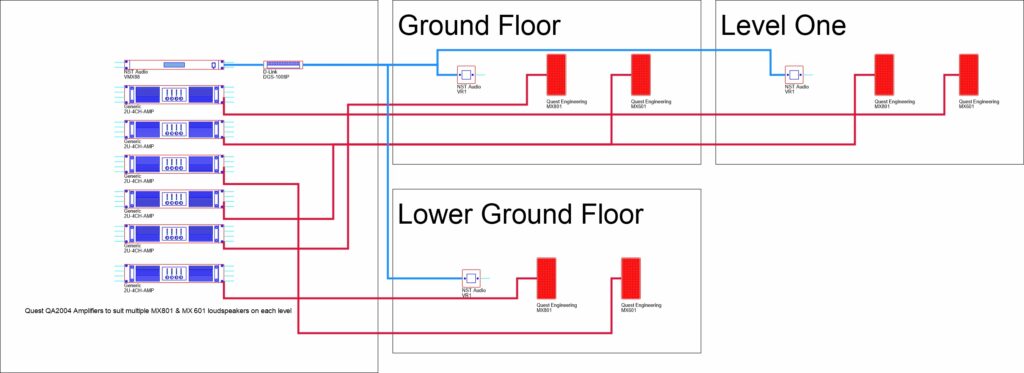
The amplifiers chosen for the venue were also Quest, and as all sources were mono, channels on these stereo amps could be allocated freely according to zone requirements and load balancing, totalling 12 channels across 6 amps. The system was run in 70V HiZ mode due to the cabling distances from the amp rack (located on the lower ground floor) to the upper floors and outdoor areas.
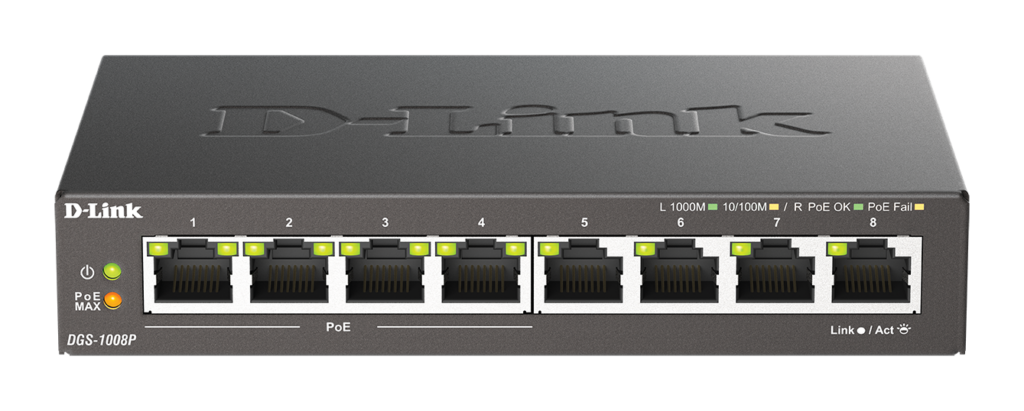
The only additional control infrastructure needed is a small 8 port unmanaged switch to supply PoE for the VR1 remote panels. 8 port is sufficient as this will allow for a connection to the VMX88L, three for the VR1s, one for a computer for configuration, and this leaves the future upgrade possibility for connection to a wireless access point so adjustments may be made to the system via D-Net in situ on each floor, perhaps via an iPad.
The three floors of the venue were further divided into six output zones covering a total of 29 speakers – a mix of the MX801 for larger areas and MX601 for more localised coverage. Both models are rated up to IP67 and so may be additionally deployed in exposed outdoor areas.
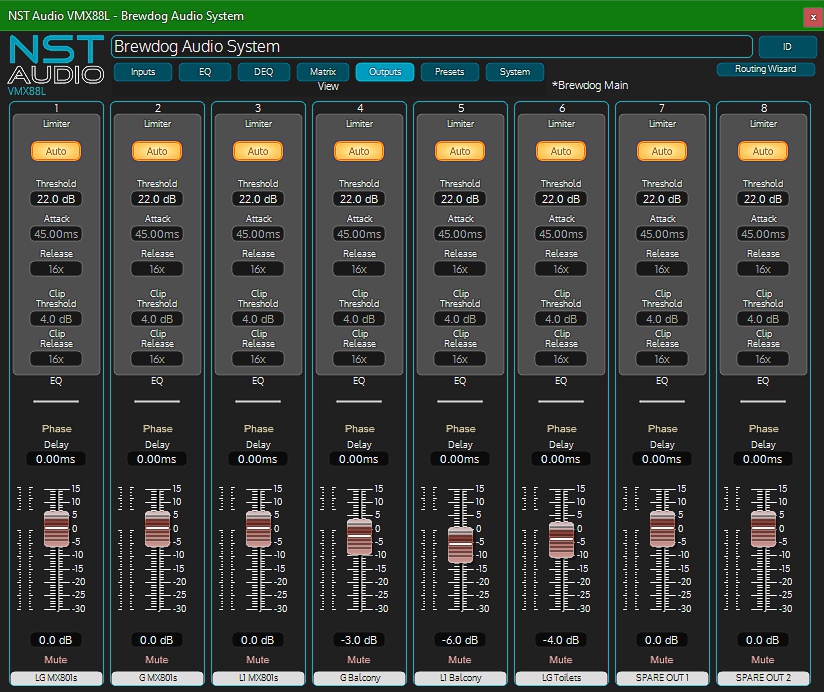
These inputs and output zones translate directly into the channels used on the VMX88, as can be seen from the channel labelling used on the input and output tabs in the D-Net configuration:
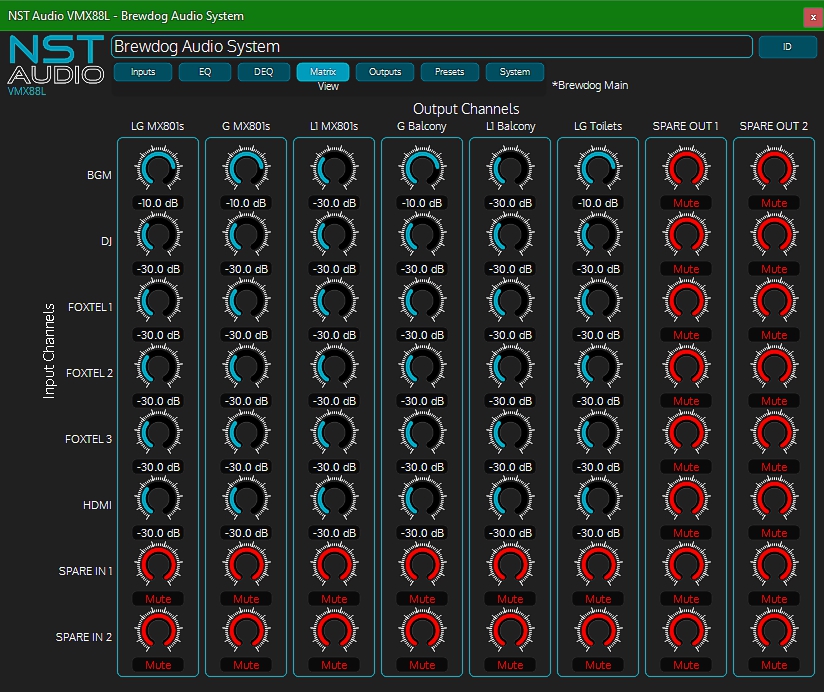
Additionally, the matrix populates controls with the same labels automatically and this tab makes the mix fed to each zone clear and easy to adjust:
Now all the inputs and outputs (or zones) have been configured, the VR1 panels to be used on each floor can be examined in more detail to see how they have been set up.
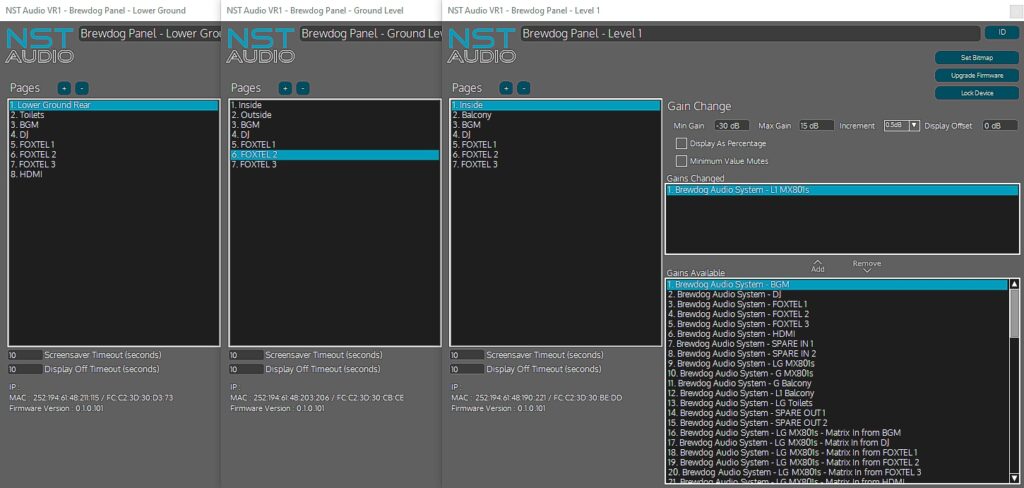
As mentioned earlier, the VR1 panels can have as many pages of control as required to allow end users to make day-to-day adjustments to the system. These could be gain controls, preset recalls, selection of input sources, or adjustment of mutes.
In this instance, multiple gain control pages were configured for each panel.
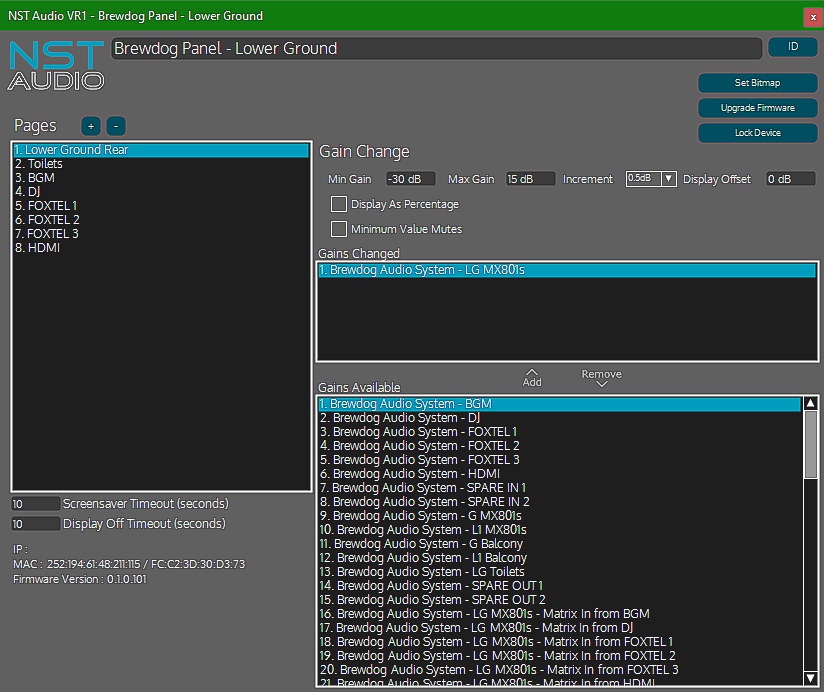
Starting with the VR1 on the lower ground floor, two gain controls have been added to adjust the output zones local to this floor. Note that the control names (so what appears on the screen of the VR1) has been chosen to reflect what the control is doing, not just a copy of the zone name. This is very useful if the control is actually adjusting multiple gains at the same time.
The remaining controls are adjusting matrix feeds for these zones, so the user can control the relative mix for this floor.
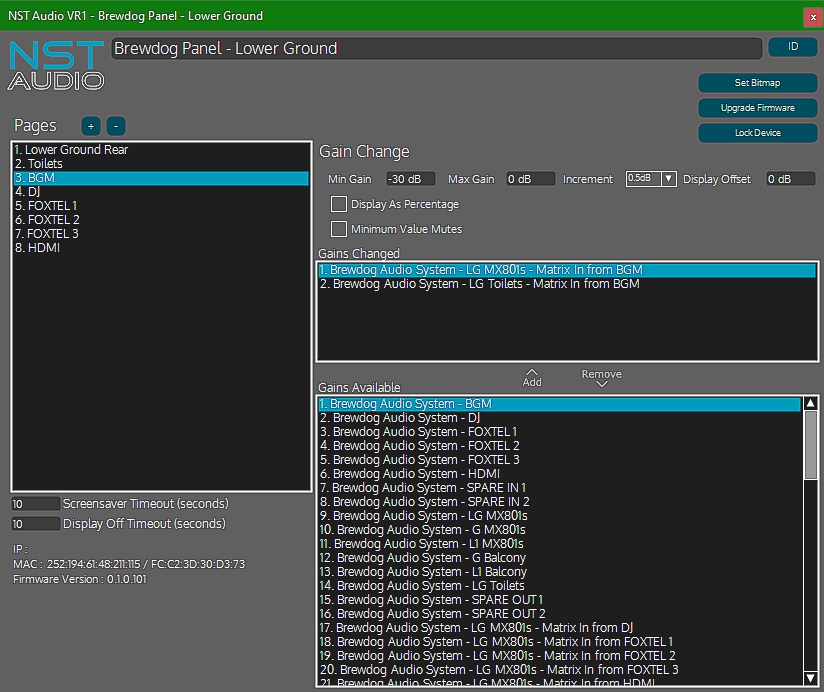
This demonstrates the ability for a single control to adjust more than one gain – in the instance below, the control is adjusting the matrix gain for both output zones at the same time, but the user sees a single control labelled “BGM”.
Similar configurations are in place for the other two panels on the ground and first floors: two pages of output/zone level controls, and a further selection of matrix mix controls for those zones together.
Note that had there been any gain controls that were common to all three VR1 panels, such as overall input gain for, perhaps, the spare inputs, adjusting these on any panel would automatically be reflected on the other panels readouts in real time.
The VR1s are PoE devices so no wall-wart or external PSU is required and their settings are backed up in flash memory, so the system can be powered down without any risk of loss of configuration settings.
Conclusion
With the VR1s now configured, the set-up is complete.
Josiah added: “The wall controls are user friendly and simple, plus they look so slick and clean in brushed aluminium.”
Josiah sums up his client’s delight in meeting their needs with the power of Quest and NST Audio’s ease-of-use:
“The best part of this job was seeing how satisfied the client was with what we achieved. The pairing of the two brands worked seamlessly and gives BrewDog complete control over their sound without being tricky to operate. The quality and output of the speakers is excellent for their size, and being able to show the staff how easy the control plates are to use was great- it was smiles all-round!”
Further Information
Download this for bedtime reading offline!
Have a look at our VMX88L training video which shows, in just 9 minutes, how to fully configure a unit for a typical installation, including setting up crossovers, labelling and routing, and handy shortcuts to speed up the process.

